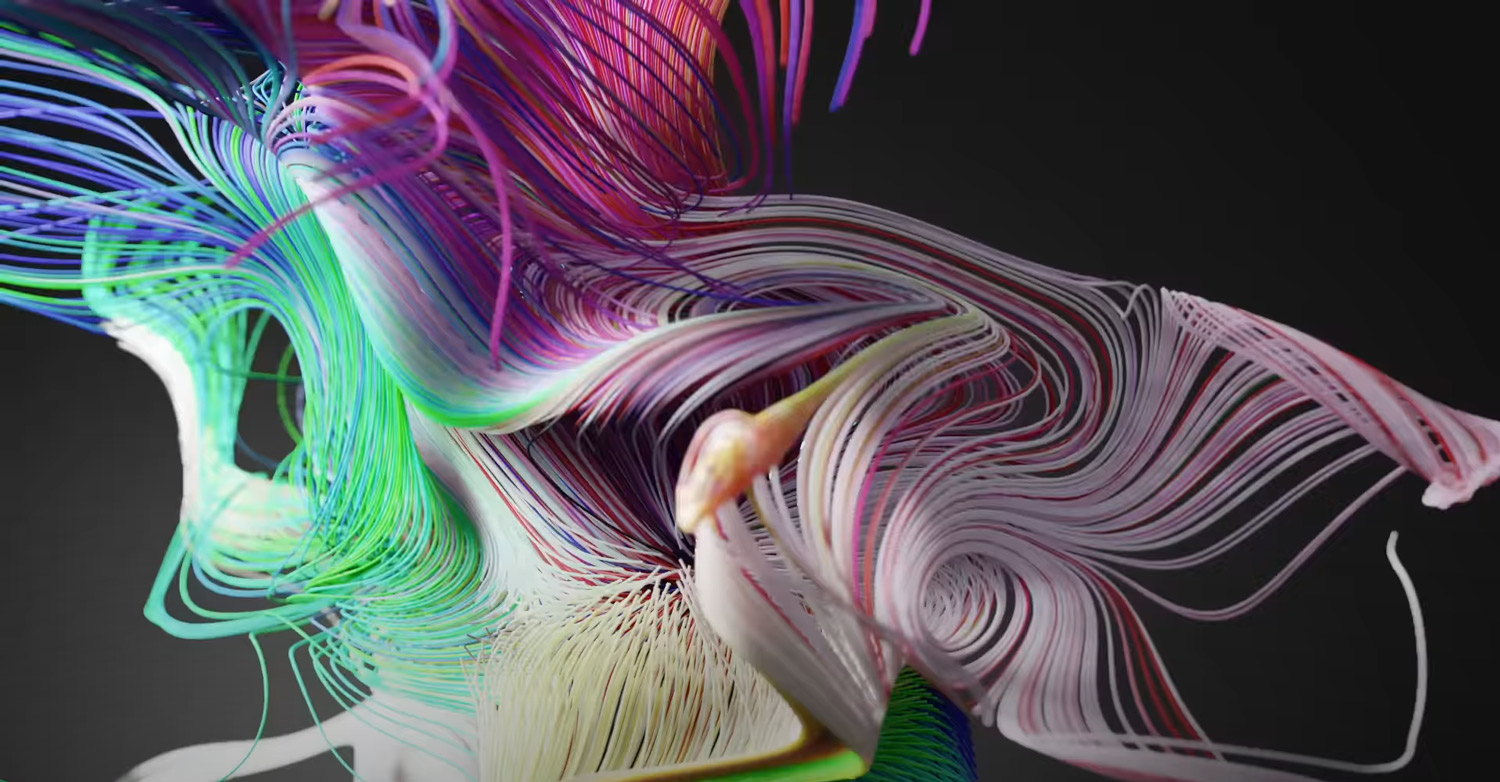
Entagma has released another fantastic tutorial, this time we will create this amazing abstract effect with Blender, using the Noise Advection in Blender’s Geometry Nodes.

We are used to seeing this effect recreated with the tools of in X Particles in C4D or recreated in Houdini using the sophisticated nodes tools, in this case, Manuel from Entagma, takes us through the creation of complex abstract effects with open-source tools using Noise Advection in Blender’s Geometry Nodes.
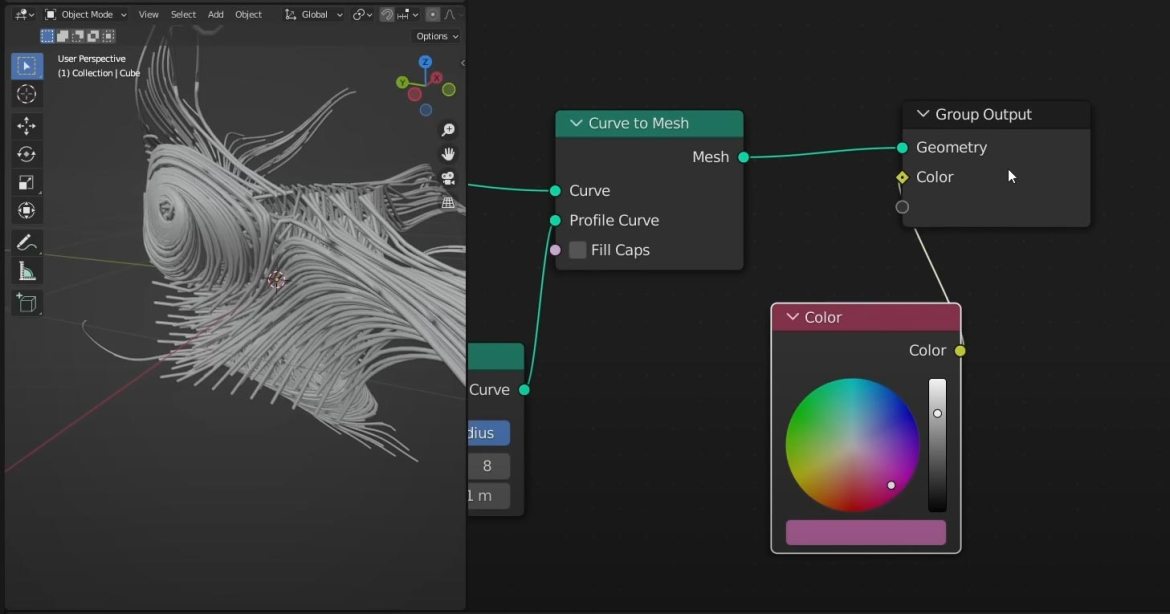
In the tutorial we will learn to start the set-up and to move with the Move Points by Noise, creating the Point Advections, after the various set-ups create the geometry from the splines created, and finally, we will see how to apply the color and create a lighting set. base in Blender.
Advecting uses points across vector fields is often useful for different purposes as in this case in the creation of complex animated motion graphics scenes such as this animation.

It can be used to visualize noise fields or vector volumes or simply to create beautiful abstract graphic effects. Follow Manuel in this tutorial, as he works lunge at the geometry nodes to make iterative noise advection along the vectors possible.
These are the topics covered in the video:
- 00:00 Intro
- 01:02 Start the Setup
- 01:39 Move Points by Noise
- 03:49 Build the Point Advection
- 10:10 Create an Iteration Group
- 15:04 Use a rectangular Spline Bundle
- 18:14 Make a volumetric Spline Bundle
- 19:54 Create Geometry for the Splines
- 20:10 Colorize the Splines
- 26:00 Finishing Touches
Also, Etagma has released .blend scene, which can be downloaded free to all, at this link: